Please allow Pop-ups from scalemodelbuildings.co in order to fully utilize our website
Model Railroading & Scale Model Building

How to use the Window & Door Template:
Model Railroading and scale model building are popular, even favorite pastimes for a growing number of people, myself included. But within the realm of related activities there is one process that I feel is a necessary evil, and I typically breathe a sigh of relief when I am able to move on to the next step in the scratch building process. I am referring to cutting out the openings for the doors and windows. Once I get that done the model building process seems to flow.
The recessed lip on most plastic HO scale doors and windows is quite small and not very forgiving. Cut the openings too small and the windows don't fit, cut them too large and you might end up re-making the entire wall section.Northeastern Scale Lumber Co. has already eliminated one laborious task by including pre-cut window glazing. Now if they could only send pre-cut holes I'd be laughing!
The Cookstown Tavern project shown here contains forty-two windows!
 That's a lot of measuring. It was this project in HO scale that gave me the inspiration and motivation to create a template to simplify the task of fitting scale model doors and windows.
I like Northeasterns products for various reasons, and we use them in several of our projects, so I decided that that would be a good place to begin in creating a template cutting guide. The downloadable templates will make the process of fitting doors and windows of scratch built structures a lot simpler and more accurate. The tutorial below demonstrates one method of using the template, but I have since discovered other methods as well. I'm sure you will discover a method that works best for you. The important thing is that the templates will greatly minimize the amount of measuring required for perfectly fitting scale windows and doors.
Click here to download free template. The template contains outlines for Northeastern Scale Lumber Co. doors and windows.
Click Here to order the Cookstown Tavern and Hotel project.
Click Here for our handy Doors & Windows Cross-reference chart
* Note: This tutorial is intended to augment ScaleModelPlan's Construction Guide, but should be sufficient for those with basic model making skills.
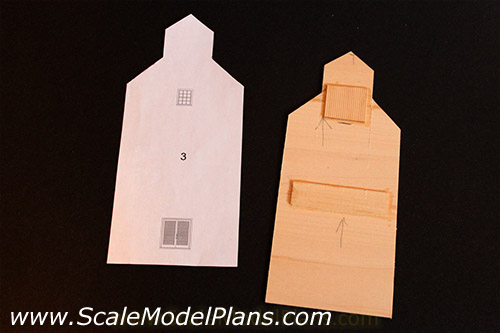
The image on the left shows one wall template for the www.scalemodelbuildings.co Alberta Wheat Pool Grain Elevator, and the corresponding wall section. The wall section has been spliced together with sections of Northeastern Scale Lumber's horizontal clapboard siding.
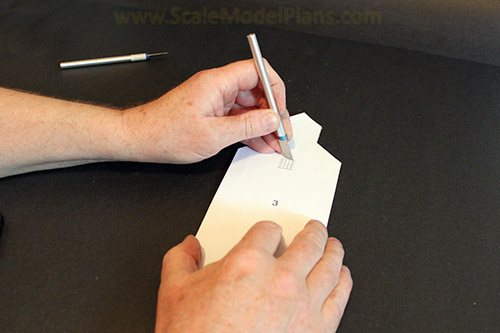
The simplest way to begin is to carefully align the template with the wall section, as shown in the Construction Guide, but to merely puncture the template along the top and either of the center or one side of the window.
The top of the window is generally the important reference point. If you notice real construction projects, (sorry, I mean 1:1 scale), generally all windows and most doors line up along the top edges. If a structure contains various sizes of windows it is usually the bottom edges that are staggered. Since most of our projects are taken from existing buildings we will assume this to be true with our projects as well.
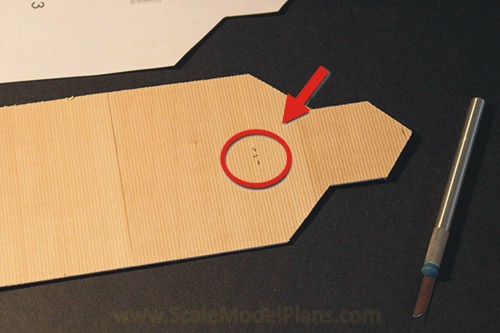
It doesn't take much at this stage. All you're trying to do at this point is establish the location of the window.
Once you've established the locations of the windows you can decide on the actual window sizes and styles that you would like to use. One thing to remember is that there have been thousands, if not millions of window variations over the years, and the exact one that you want might not be commercially available. You have two choices - use something close, or modify an existing window.
Another thing to keep in mind is that right up to the middle of the 1900's many windows were fabricated on site, and may not have been built to a standard size.
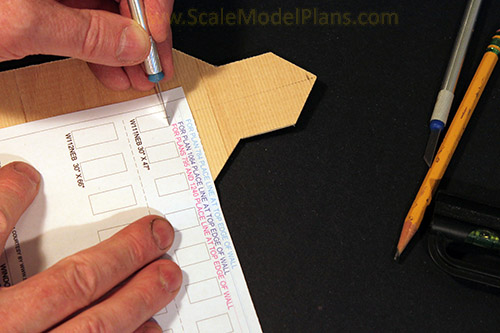
Choose the window part number from the template sheets and continue cutting out the openings as shown in the Construction Guide. Use the "top of wall" reference lines when available, or draw your own to correspond to the project you are working on. In the case of the grain elevator to the left, I was able to align one of the existing "top of wall" lines to the horizontal siding.
It may be advantageous to place a scrap piece of foam board under the wall section to allow the knife to pierce through the material. Just make sure that the material doesn't flex to the point of splitting.
* Different types and brands of printers will produce variations in line thickness, so you may have to make adjustments, (ie. cutting toward the inside, or outside of line).
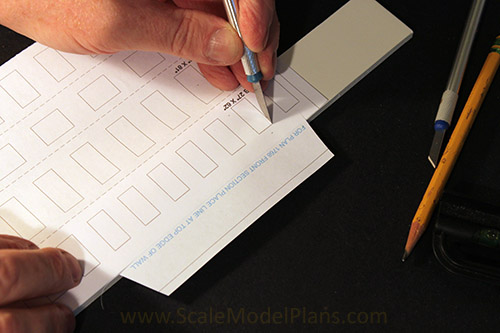
The procedure is the same for foam board construction. This is a wall from the Princeton Station.
Note that the "top of wall" reference line is aligned along the top edge of the foam board wall section. Masking tape can be used to temporarily secure the template in place.
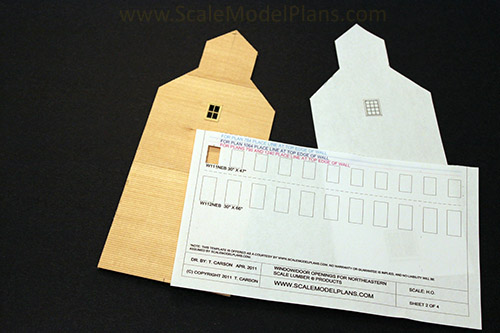
A perfect fit!
Definitely simpler than measuring each window. Feel free to use this template for your upcoming projects.
Share this with a friend! Copy and paste the URL from the address bar at the top of your web browser and email it to a fellow modeler.
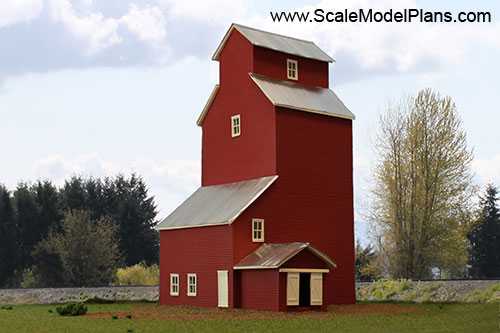
This is the HO scale version of Plan 1166, Grain Elevator, using windows from Northeastern Scale Lumber.
The plans are available HERE in N, HO, OO, O and Garden Scale.
Windows and doors are available from Northeastern Scale Lumber.
Follow link for cut-out dimensions of several popular brands of doors and windows ![]()
View our On-line Catalog of N Scale and HO Scale plans, templates, and Cardstock patterns, then click to order the printable PDF files so you can get started on your next project.
Disclaimer:
Information provided in these tutorials is for
informational purposes only. Owners of this website offer no
guarantees and assume no responsibility or liability of any type
with respect to the content of these tutorials and will not be
held liable for any damages or injuries caused by using or
misusing the information on this site, and anyone using these
methods does so at his/her own risk. By viewing these articles
you agree that you will not hold, or seek to hold, Owners of
this site responsible or liable with respect to the content of
this site. Processes illustrated on this website should not be
undertaken without a complete understanding and knowledge of the
safe and proper use of all related tools and processes.
Contact Us © 2023 T. Carson Legal


