Please allow Pop-ups from scalemodelbuildings.co in order to fully utilize our website
Make your Own Drive-In Theatre:
This tutorial
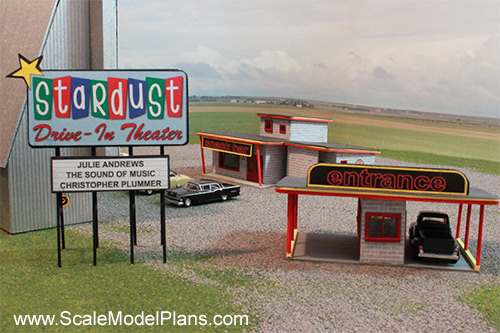
provides a general guide in turning Plan 1515, the Stardust
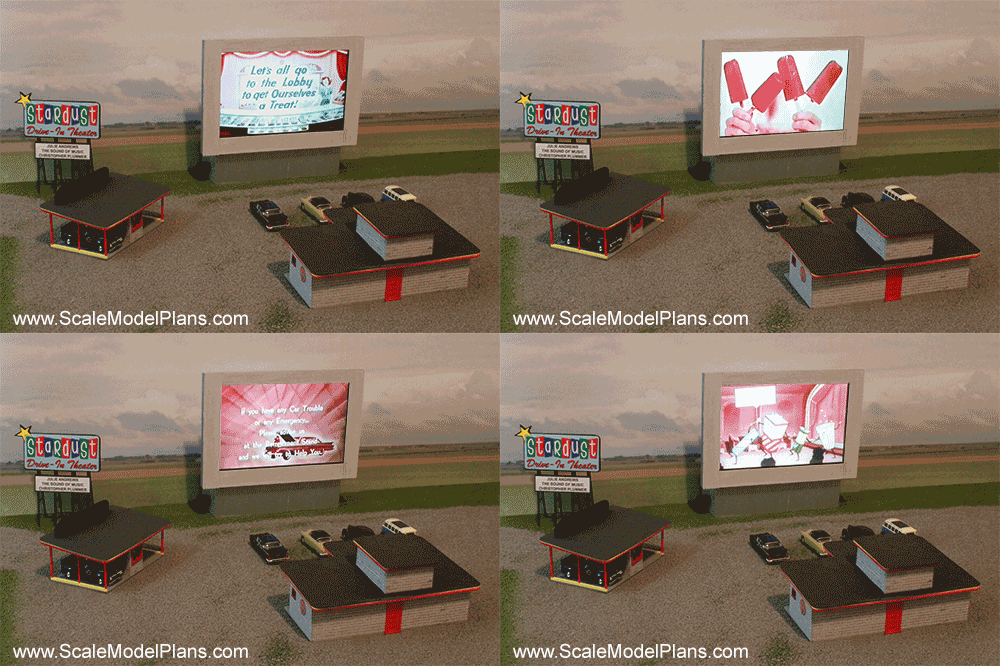
Theatre, into a working model using a common digital photo-frame
to present a slide show of classic theatre  related images. A
similar process could be used for adapting a portable DVD player
to have a working movie theatre.
Plan 1515 also comes with static images of vintage theatre scenes, as well as a cardstock version of the entire plan, but for the more adventurous modeller the entire drive-in movie theatre can be constructed for $50 - $100 including materials and electronics.

Plan 1515, the Stardust Theatre, can be constructed as a static display model using a suitable printed graphic on the screen, or if you are ready for more of a challenge, you can create an actual miniature 'movie' theatre that will provide even more realism.
These are the key elements used for this demo, a Sony 7 in. digital photo frame, power supply, and remote. The remote will come in handy if the theatre is placed in an inaccessible location on your model railroad layout.

Some models of digital photo frames are compact enough to use "as-is" and mounted directly onto the theatre screen/service building of Plan 1515. In other cases, removable of the LCD screen and electronics from the plastic housing will allow for a more accurate and realistically appearing scale model. A small Phillips screwdriver was all that was required to disassemble this unit.

The Sony has three ribbon cables connecting the various electronic components. These ribbon cable should be temporarily disconnected to avoid stress or damage to the components.

Ribbon cables are held in place by a hinged plastic latch. Use the edge of a small screwdriver or pin to flip the latch upward. The ribbon cable should then easily slide out. Pay attention to the position of the cable and to which side of the cable has the exposed contacts. You might want to mark them with a fine point felt marker before removing them..

The controls for the Sony player are located along one edge of the case. I will remove them as a unit and relocate them inside the model. |

Remove the circuit board before cutting the plastic housing.

The plastic housing can be cut with a razor saw or other fine tooth saw.

Reassemble the control unit.

This is the assembled theatre screen/service building that will house the electronics from the digital photo player.
Templates for this structure are included in Plan 1515, along with those for the concession building, ticket booth, and Stardust Theatre signs.

The roof is assembled separately so that it can be removed to access the electronic controls once the theatre is assembled.

Refer to the scaled plans included in Plan 1515 for the location of the guides and reinforcements of the roof assembly.

A wooden frame/case will be constructed to attach the LCD screen to the structure. The frame can also be used to hide the metal housing of the digital screen.
Refer to the plans for the placement and dimensions of the wooden strips. Some adjustments may be necessary depending on the model of digital photo frame used for the project.

It may be necessary to shim out various locations so that the final rear panel will fit flush.
Use 1/16" thickness balsa or other material to form the outer walls of the assembly. These will need to be of sufficient width so that the rear panel will mount flush, and provide a flat surface with which to mount the assembly onto the structure.

The rear panel will be glued to the theatre screen/service building structure. Because only the outer areas of the rear frame will be exposed it was not necessary to completely cover the electronic circuit board.

The front of the screen will receive strips of veneer to hide the metal edges.

The frame was painted aluminum as was the Northeastern Scale Lumber corrugated metal siding used for the structure.
Re-attach the ribbon cables and carefully place the electronic components into the structure.

Use a glue stick to mount the components inside the structure. Glue guns can generate a lot of heat. Be extremely careful not to overheat the circuit boards.

The power cable can be run underneath your layout, but I chose to drill a hole and mount the jack flush to the side of the structure.
OK, it's almost time for the popcorn.
View our On-line Catalog
of N Scale and HO Scale plans, templates, and Cardstock patterns, then click to order the printable PDF files so you can get started on your next project.
Disclaimer:
Information provided in these tutorials is for
informational purposes only. Owners of this website offer no
guarantees and assume no responsibility or liability of any type
with respect to the content of these tutorials and will not be
held liable for any damages or injuries caused by using or
misusing the information on this site, and anyone using these
methods does so at his/her own risk. By viewing these articles
you agree that you will not hold, or seek to hold, Owners of
this site responsible or liable with respect to the content of
this site. Processes illustrated on this website should not be
undertaken without a complete understanding and knowledge of the
safe and proper use of all related tools and processes.
Contact Us © 2022 T. Carson Legal


