Please allow Pop-ups from scalemodelbuildings.co in order to fully utilize our website
Scratch Building with scalemodelbuildings.co - continued:
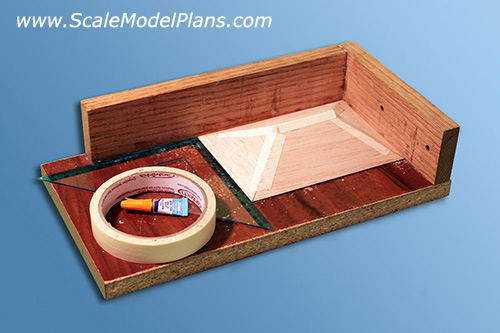
Test fit with masking tape and make any adjustments before gluing together. Super glue a few spots to hold the assembly together. Once the glue sets turn it upside down and finish gluing.
A glue gun will add considerable strength but can have a tendency to warp the project as the glue cools. To prevent warping hold the assembly upside down against a flat surface while cooling.
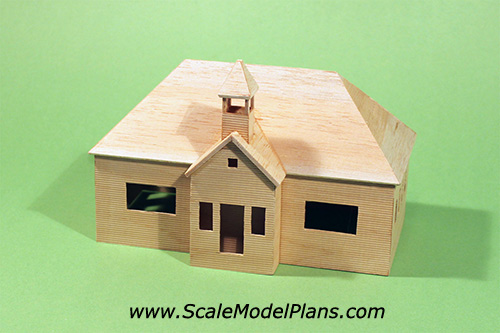
Test fit the roof to the structure before final gluing. Sand any rough edges at this point. Carefully scrape off any excess glue as well.
Painting the fascia is easier before the roof is glued to the walls.
Leave either the roof or the floor un-attached until the windows are in place. This will allow you to make corrections if a window or door doesn't fit properly.
There are commercially available paints specifically for scale models, but regular craft-store acrylics will work. They are available in several colors, can be mixed, and clean up with water.
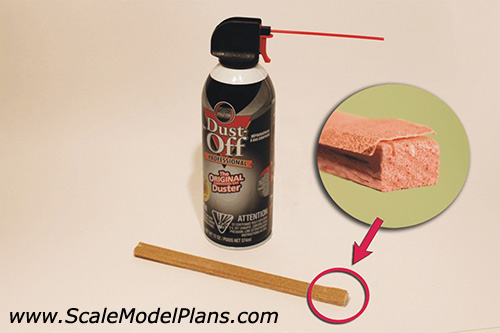
A sanding block/file can be made by gluing a strip of sandpaper to a straight piece of balsa or other wood. 120 grit will work as a small file to smooth and straighten rough spots. For versatility leave one side of sandpaper flush with edge and let the other side overlap.
Blow the dust off the project before painting, or better yet, use a tack cloth.
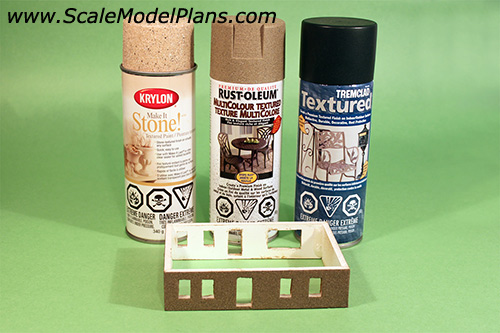
For foam-core, balsa, or other non-textured models, Krylon, Tremclad, and Rust-oleum each make a line of textured spray paints that will resemble stucco.
The Krylon Make It Stone! is a little heavier and resembles a Spanish or Arizona stucco finish, whereas the Rust-oleum MultiColour Textured creates a heavy-dash effect. The Tremclad Textured product is the smoothest of the three and produces a "fine sand float" stucco appearance. Read the directions on the cans carefully, as each requires it's own application technique.
*Refer to website www.scalemodelbuildings.co links page for a list of suppliers
Gray acrylic paint can be used to create the appearance of a concrete foundation on a foam-core model.
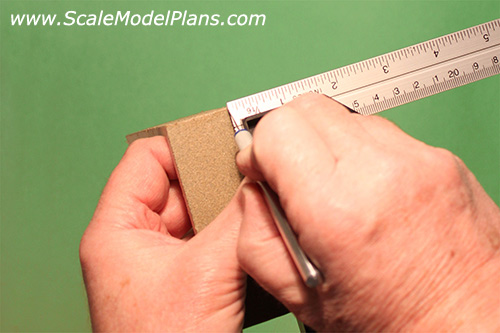
Set a mitre square to 3/32" for H.O. scale, or about 3/64" for N scale. Most houses have somewhere between 6 and 8 inches of concrete foundation exposed above the grade. Scribe the lower section of wall at each corner of the wall assembly. The scribed line will help to prevent paint from bleeding into the painted wall section.
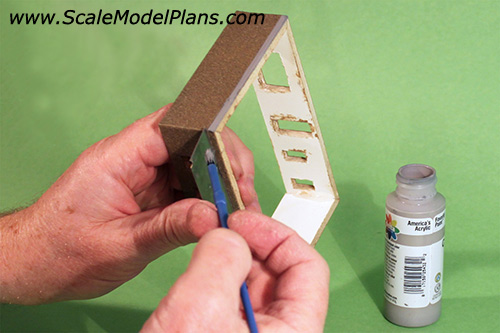
Use a full length strip of a snap-blade knife to cut in slightly to the painted wall. The knife blade will form a seal in the soft paint preventing the acrylic paint from seeping up into the painted wall, and will also create an obvious distinction between the "stucco" and "concrete".
Paint the lower edge of each wall, carefully sliding or re-locating the knife blade as you go.
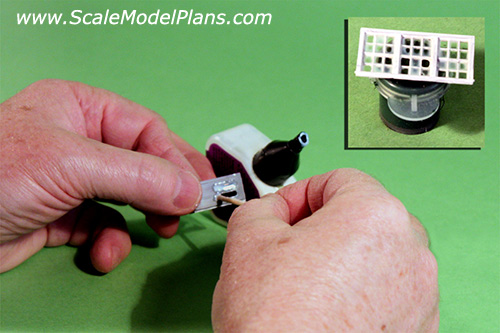
Windows:
Two common methods of "glazing" windows are using canopy cement, and gluing in strips of acetate.
Canopy cement is trickier to work with, but is ideal for very small openings. Dip a toothpick into the cement. With the cement almost dripping off the toothpick, wipe it around the inside edges of the opening in a clockwise or counter clockwise manner. As the cement starts to cling to the edge of the opening pull toward the center, then slowly outward. The technique may take a bit of practice.
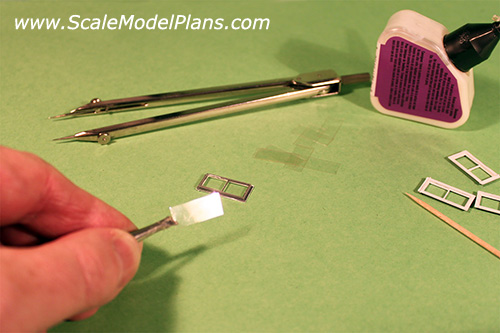
With acetate windows, (overhead transparency sheets from an office supply will work), accurate measurement is the key. Measure the recess in the back of the windows with dividers and transfer the dimension to the acetate. You can mark the acetate by scratching it with the points of the dividers. For multiple windows of the same size you can use a paper trimmer to cut strips, then cut each piece to length with a knife or scissors. Use Clear Parts Cement & Window Maker to glue acetate pieces to windows.
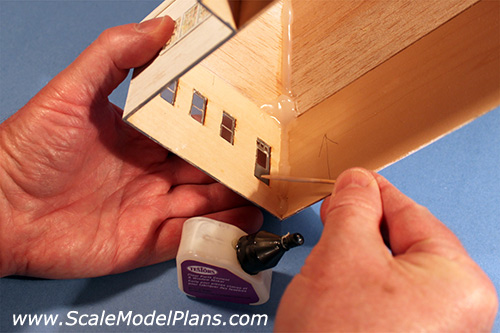
Allow the glue to completely set, and paint the structure before installing the windows.
Use Clear Parts Cement & Window Maker to fasten windows to the structure. Dip a toothpick into the glue bottle and let it drip down to the end of the toothpick. Touch the toothpick to the edge of the window at the wall opening and let the glue flow to the edge. For best results avoid touching the acetate with the glue.
Install the roof after the windows are in place and the foundation line is painted.
If for any reason the building does not sit flat at this point, there are a few tricks you an use to straighten things out. Use a glue gun to add extra glue to opposite corners inside the building. Hold the building upside down against a firm flat surface for a few minutes while the glue cools and sets. If necessary, cut and fit a few 'struts' inside to reinforce and align the structure.
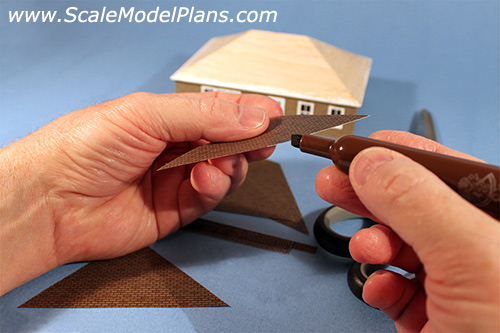
You can often use the same patterns to cut out the roofing material. Check the patterns for size against the roof surfaces. Depending on the thickness of material used for the roof you may have to add an allowance along the edges of the pattern when you cut the roofing.
There are various brands of roofing available in both glue-on and self-stick. You can even print your own with a good color printer. Weathering kits will help add realism.

Run a felt pen or water color marker along the lower edge of the roofing material to hide the white edge of the cut material. The white edge would otherwise stand out and detract from the realism of the model.
Actual roof shingles project slightly beyond the edge of the roof deck material at the fascia, so when placing the roofing material allow about 0.010" overhang.
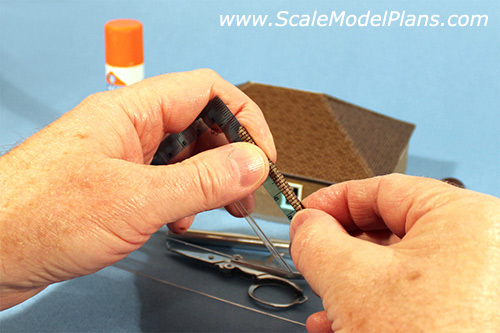
Cut strips of material to serve as ridge caps. Crease the strips by folding them over a straight edge. Hip roofs will have caps at each roof surface intersection as well as the ridge.
Run a felt pen or marker along all edges of each strip to hide the white edge.
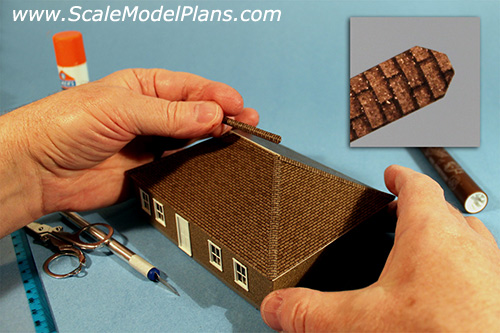
Chamfer the end of each strip where it will be covering the bottom corners of the roofing. Chamfer both ends of the ridge cap, (the strip at the very top).
The ridge caps will be bonding to the waxy surface of the roof material, so a glue stick might be necessary.
The top ridge cap will be the last one to apply.
The Finished Product:
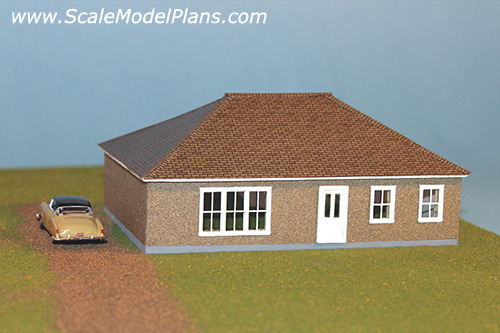
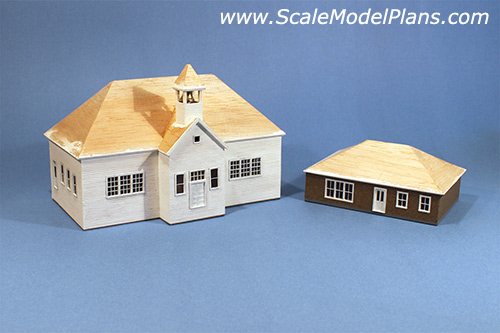
Individuality and choice of materials will determine the final appearance of your project. The walls of the house to the left were constructed with 3/16" foam-core, the roof was constructed with 1/8" balsa, and the finish is Rust-oleum MultiColour Texture Autumn Brown.
Using clapboard or board & batten siding (available from Northeastern Scale Lumber) would give a significantly different, yet authentic look.
Click Here for Plan 1176 in N, HO, OO, or O scale.
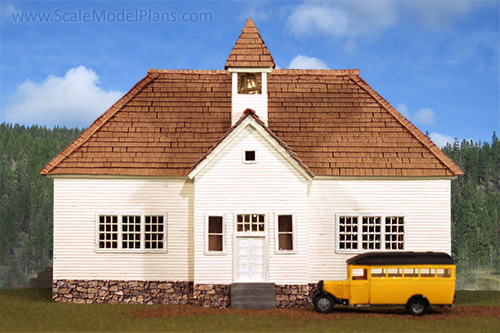
This is Plan 1917, Pettigrew School using clapboard siding from Northeastern Scale Lumber.
Click here for a tutorial on making your own shake roof.
Click Here for Plan 1917 Pettifrew School in N, HO, OO, or O scale.
View our On-line Catalog
of N Scale and HO Scale plans, templates, and Cardstock patterns, then click to order the printable PDF files so you can get started on your next project.
Disclaimer:
Information provided in these tutorials is for
informational purposes only. Owners of this website offer no
guarantees and assume no responsibility or liability of any type
with respect to the content of these tutorials and will not be
held liable for any damages or injuries caused by using or
misusing the information on this site, and anyone using these
methods does so at his/her own risk. By viewing these articles
you agree that you will not hold, or seek to hold, Owners of
this site responsible or liable with respect to the content of
this site. Processes illustrated on this website should not be
undertaken without a complete understanding and knowledge of the
safe and proper use of all related tools and processes.
Contact Us © 2022 T. Carson Legal


