Please allow Pop-ups from scalemodelbuildings.co in order to fully utilize our website
Scratch Building with scalemodelbuildings.co - continued:
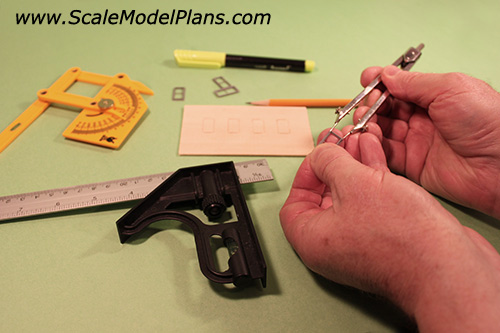
There are various methods you can use to transfer the remaining dimensions. A drafting divider can be found in most office supply, craft, or hobby stores. The dividers can be used to transfer the width and height of the windows from the top and edge already scribed onto the material.
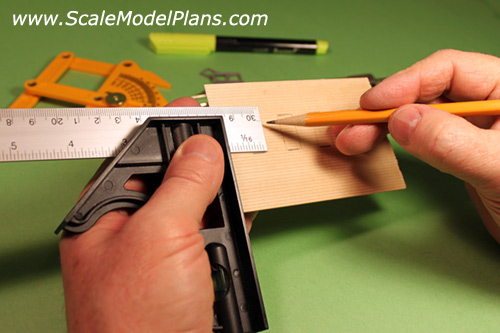
A mitre square can be used to help align window openings. Mark the opposite side of each previously scored window with the measurement from the dividers, and finish off with the mite square.
Once the window and door openings are marked, use a curved-blade knife to score along the lines.
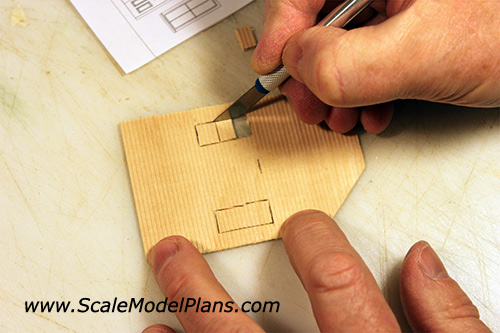
A curved blade can be self-aligning whereas a flat or angled blade will try to create it’s own path, so any deviation from the line would tend to be exaggerated.
Switch to a pointed blade for the corners.
Use a rocking motion of the blade to gradually deepen the cut and keep the cuts straight. Start with the corners and work your way to the middle of each line.
Patience pays off at this stage! Take your time, and you will be pleased with the results.
*Caution: When working near the edge of a wall it may be necessary to remove the foam-core backer board and work directly on a firm surface to prevent excessive flexing of the material.
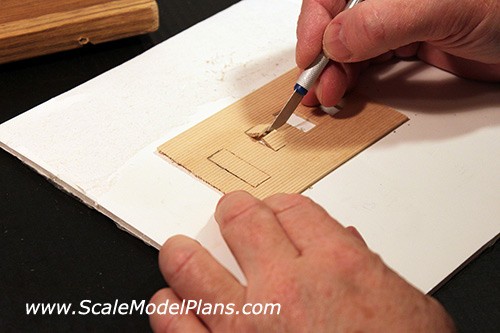
The smaller the project the more fragile it can become. The width of even the sharpest blade can distort the material to the point of splitting. Using ‘relief cuts’ will help to relieve the stresses and prevent splitting. Cutting out and removing smaller sections may take a little longer, but it will pay off in the long run.
Small splits and cracks can be repaired with super glue.
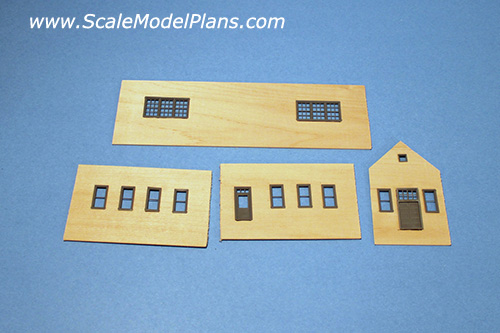
Test fit all doors and windows before assembling the walls. Shave the inside of the openings if necessary. Don’t force the windows in place, but don’t over-enlarge the openings either. The window flanges are fairly small, so won’t hide much in the way of imperfections.
Foam-core Construction:
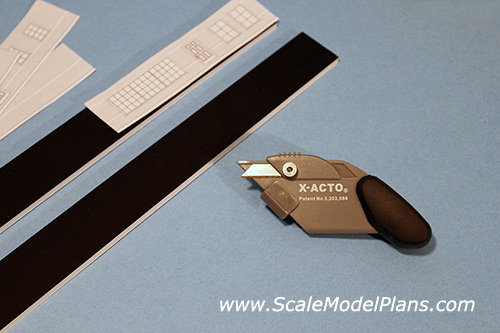
This is the cottage Plan 1176. Cut strips of foam core using the pattern pieces as a guide, as with the scaled lumber example. Any straight-edge, such as a carpenter's framing square, or steel ruler will help with the straight cuts.
A regular snap blade box cutter works well for straight cuts. You can also use an X-acto knife or a reinforced edge razor blade. It is best to cut in two or three light passes instead of trying to cut completely through in one pass. The most important cut is the first, where you carefully score the outer paper layer.
The X-Acto X7747 Foam Board Cutter is designed for cutting both 45° and 90° angles, but you can freehand cut 45° angles with an X-acto knife and a little bit of practice.
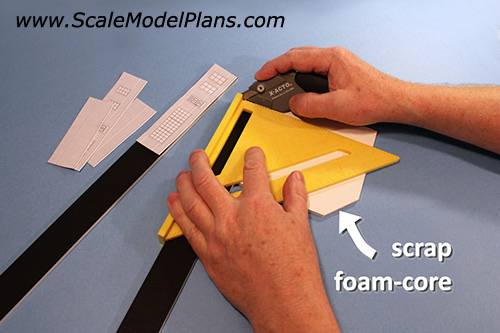
When making 45° cuts with the foam board cutter use a scrap piece of the same thickness foam-core as a "run-off", otherwise the cutter may tip before the blade reaches the end of the mitred cut.
*Note: Foam-core is available in various colors. I use black when painting with darker colors. If the foam board is the same color on both sides you can save time by flipping over after each cut. (one cut makes two mitres!)
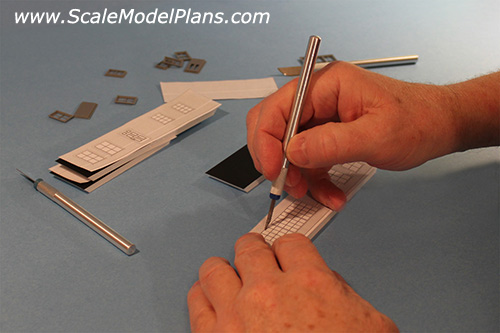
With all of the wall sections cut out, mark the top and one side of each opening. Some of the plans may have multiple lines, indicating window openings, frames, and casings. Lay the windows out on the template to decide which of these template lines you need to follow, based on the actual size of the windows you are using.
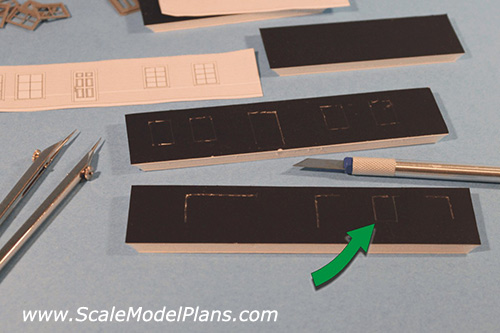
You can use dividers or a mitre square to transfer the remaining dimensions. You can also set each window in place and press firmly enough to leave an impression in the foam-core, (as indicated by the arrow).
A pointed blade may work better in foam-core than a curved blade. Use a sawing motion, and periodically flip the material over to score the paper from the other side. It’s best to cut through each side separately rather than puncture through from the opposite side. The paper backing can have a tendency to pull away from the foam.
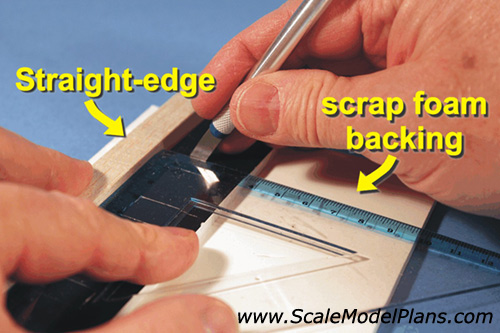
A cutting guide can be improvised with a small straight edge and clear plastic set square. This will keep your cuts nice and straight, and will help to prevent the knife from wandering off the lines.
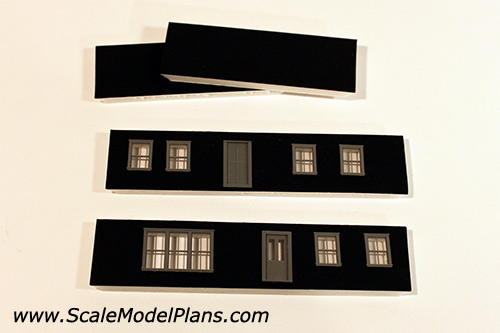
Test fit the windows before gluing the walls together. If the openings are the proper size the windows will ‘snap’ slightly into place. If the windows bow out even slightly, the openings are too small and need to be shaved slightly.
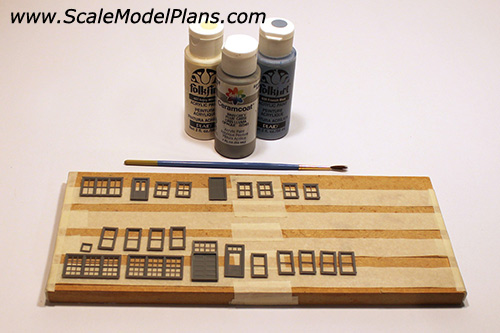
It's a good time to paint the windows, allowing them to dry while you work on the next few steps. Craft paints offer a variety of colors but do not flow out as nicely as enamels. Testor's makes a 'Military' set of flat enamel paints which are ideal for painting windows. Gloss colors won't look as realistic.
To hold the windows and other small parts for painting use a scrap block of wood with inverted strips of masking tape secured at each end and the middle. The masking tape will hold small parts securely while brushing or spraying.

There are various commercially available clamping jigs, but you can fabricate one yourself that will do the job. The most important aspect is to make your angles a perfect 90°. The accuracy and workmanship will depend on having perfectly square corners.
With the first two wall sections secured in place a few drops of super-glue will hold things together. Take care that the glue doesn't leak through onto the jig.
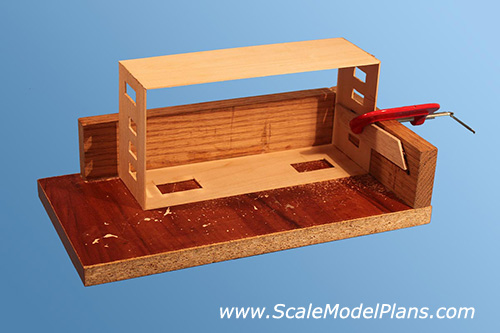
Once you have all sides tacked together you can double check for square before final gluing.
A glue gun will greatly add strength to the corners. The hotter the glue, the better it bonds by seeping into the pores of the wood, but excessive heat may cause the pieces to warp.
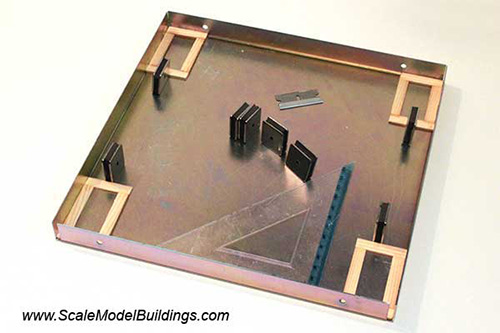
This is a magnetic gluing jig from Micro-Mark. There are various other styles of clamping/gluing jigs available.
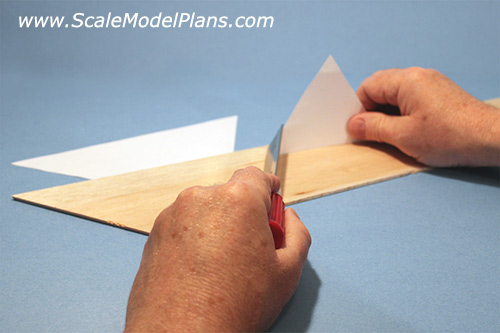
Hip roofs are more complex and labor intensive, but the templates make the process a lot easier. Each mating roof edge should be cut at an angle, so they meet without a gap. A simple way to cut roof sections to the proper angles for hip roof construction is to use any of the roof templates as an angle guide. Hold the template upright and parallel to the edge of the roof material. Tilt the saw to match the angle. With the saw held at that angle, and on the cutting line, position a straight-edge in place to guide the saw blade, and finish the cut. Practice on a few scrap pieces first, and you will see how easy it is.
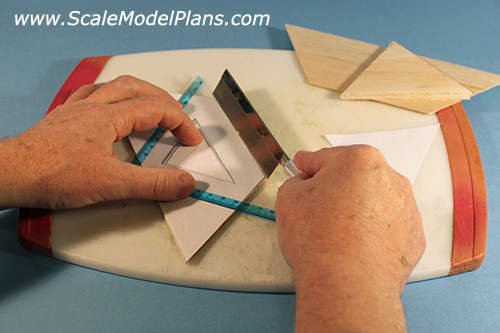
Cut the ridge angles according to the plan/template. A 12/12 pitch roof will be 45°. Minor imperfections will be hidden by the roofing material, and a razor blade or X-Acto knife can be used to 'fine-tune' the mating surfaces.
For Plumb Cut eaves, (fascia is straight up and down), cut the eave at the same angle (parallel) as the ridge. For 'square cut' eaves leave the eave edge at 90°.
View our On-line Catalog
of N Scale and HO Scale plans, templates, and Cardstock patterns, then click to order the printable PDF files so you can get started on your next project.
Disclaimer:
Information provided in these tutorials is for
informational purposes only. Owners of this website offer no
guarantees and assume no responsibility or liability of any type
with respect to the content of these tutorials and will not be
held liable for any damages or injuries caused by using or
misusing the information on this site, and anyone using these
methods does so at his/her own risk. By viewing these articles
you agree that you will not hold, or seek to hold, Owners of
this site responsible or liable with respect to the content of
this site. Processes illustrated on this website should not be
undertaken without a complete understanding and knowledge of the
safe and proper use of all related tools and processes.
Contact Us © 2022 T. Carson Legal


